Crime Scene Lab
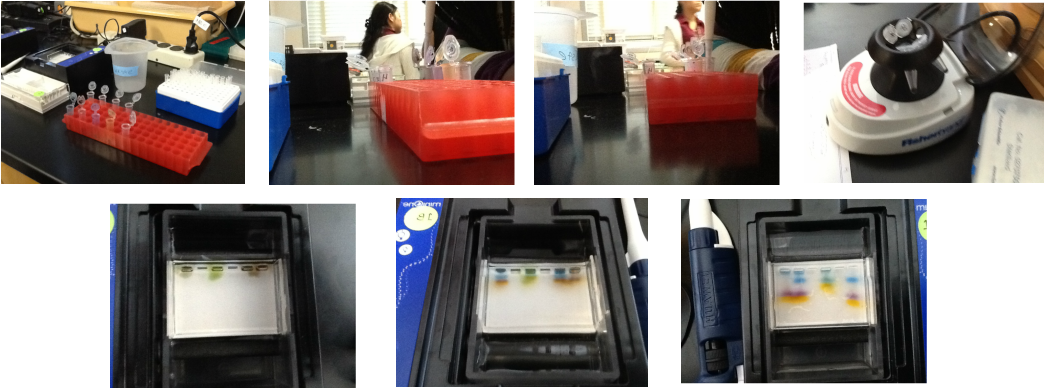
In the Crime Scene Lab, we learned how to use a micro pipette in order to place it within gels. We used the micro pipette to take DNA, which was cut with restriction enzymes. These restriction enzymes create DNA fragment pieces. In order to do this lab, we had 4 samples of blood. There was the victim's blood, the blood at the crime scene, suspect 1's blood, and suspect 2's blood. We also had distilled water to mix with the blood, and put each in a separate clear tube. After pipetting each blood sample to different tubes and adding distilled water, we placed the mix in centrifuges before we loaded them in the gel. After waiting 10 seconds for the centrifuge, we pipette each sample of blood in different holes in the gel. We added buffer, and waited 20 minutes. What the gel does is that it ends up showing how the DNA (which was dyed) was separated. By the pictures above, you can see the progression as the blood goes through the gel, and it eventually lets us see who killed the victim.
DNA Fingerprinting
Step 1: Pour the restriction enzymes into DNA
The restriction enzymes act like scissors, and cut the DNA in different parts. Where the DNA is cut depends on the enzyme's code as well as the DNA's code. This causes each person's cut strand to be different. Some may be long, and some others may be short.
Step 2: Pour agarose gel into tray on lab counter.
Agarose gel is like Jell-O, as it is thick. It strains the DNA molecules, which allows the smaller pieces to pass through easier than the larger pieces.
Step 3: Pour DNA into tray.
The agarose gel has a hole in it for the DNA to be poured into. The DNA is now waiting to go through the gel.
Step 4: Push "POWER" button on tray to begin electrophoresis.
Electrophoresis is the process of moving molecules with an electric current. DNA has a slightly negative charge, so it heads towards the slightly positive charged part of the tray. Since the gel acts like a strainer, the smaller portions of the DNA slip through until they eventually reach the end of the tray. When you look at the gel, the DNA fragments are distributed within the gel according to the length.
Step 5: Place nylon membrane on top of the gel.
The nylon membrane is placed on top of the gel to have the DNA transfer to the nylon membrane. The DNA ended up getting on the nylon membrane as the gel's liquid traveled to the absorbent material.
Step 6: Add probes to the nylon membrane in the tray.
The probes added are pieces of DNA that have been radioactively labeled. These probes are attached to the DNA on the nylon membrane. However, they are only attached to where they see a certain piece of events in the DNA. The extra probes are washed away.
Step 7: Place X-ray film on top of nylon membrane in tray.
The x-ray film reveals some places of the radioactive areas in the probes in certain areas of the nylon membrane.
Step 8: Develop the film by dragging it over to the developer.
The film shows the locations where the probes have attached on the nylon membrane. This is our DNA fingerprint.
WHO DID IT?!
After waiting for the film to be developed, we were given the DNA fingerprint. We had to match the DNA with all of the sisters' fingerprints. By doing this, we figured out the culprit is Honey.
HONEY HOW COULD YOU?!


